

Thino Installation and Pro Activation
Thino Installation and Pro Activation
Get Thino Pro
Basically, You can use thino basic verison for free. In the future, it will continue to be available in the Obsidian official market, PKMer market, etc.
Usually, the basic version will not add new features, unless there are major reasons and experience issues, only stability fixes will be made.
- You can read the changelog from 0x-thino-changelog,and but it here
Installation
2.3.0 and later versions
You can download it from the Obsidian official market, PKMer market, etc.
After you buy the pro version, you can activate it in the following ways:
Thino Pro Activation
- Download:
- First, get the corresponding Thino version from Obsidian official market, PKMer market, etc.
- Install it to your plugin directory, you can refer to Obsidian Community Plugin Installation
- Activate:
- 【Plugin】In the plugin settings, in General, click
Get Thino id, and then clickGet Thino activation token - 【Website】In the website personal center Thino page, click
Get Thino activation code - 【Website】In the pop-up window, fill in the token obtained in steps ①② and paste it into the dialog box, click
Generate and copy the activation code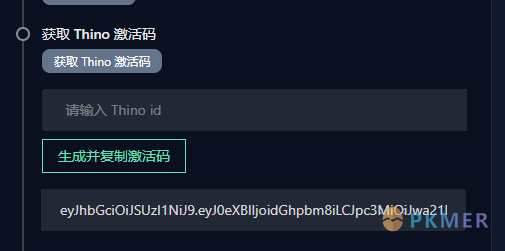
- 【Plugin】Paste the
activation codeobtained in step ③ into the 【Plugin】 settings dialog box, clickVerify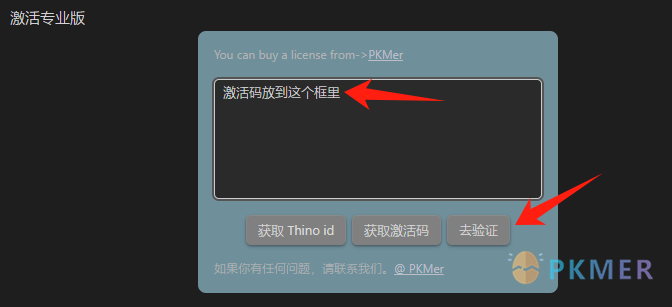
- 【Plugin】After the activation is completed, you can use all Pro functions
- 【Plugin】In the plugin settings, in General, click
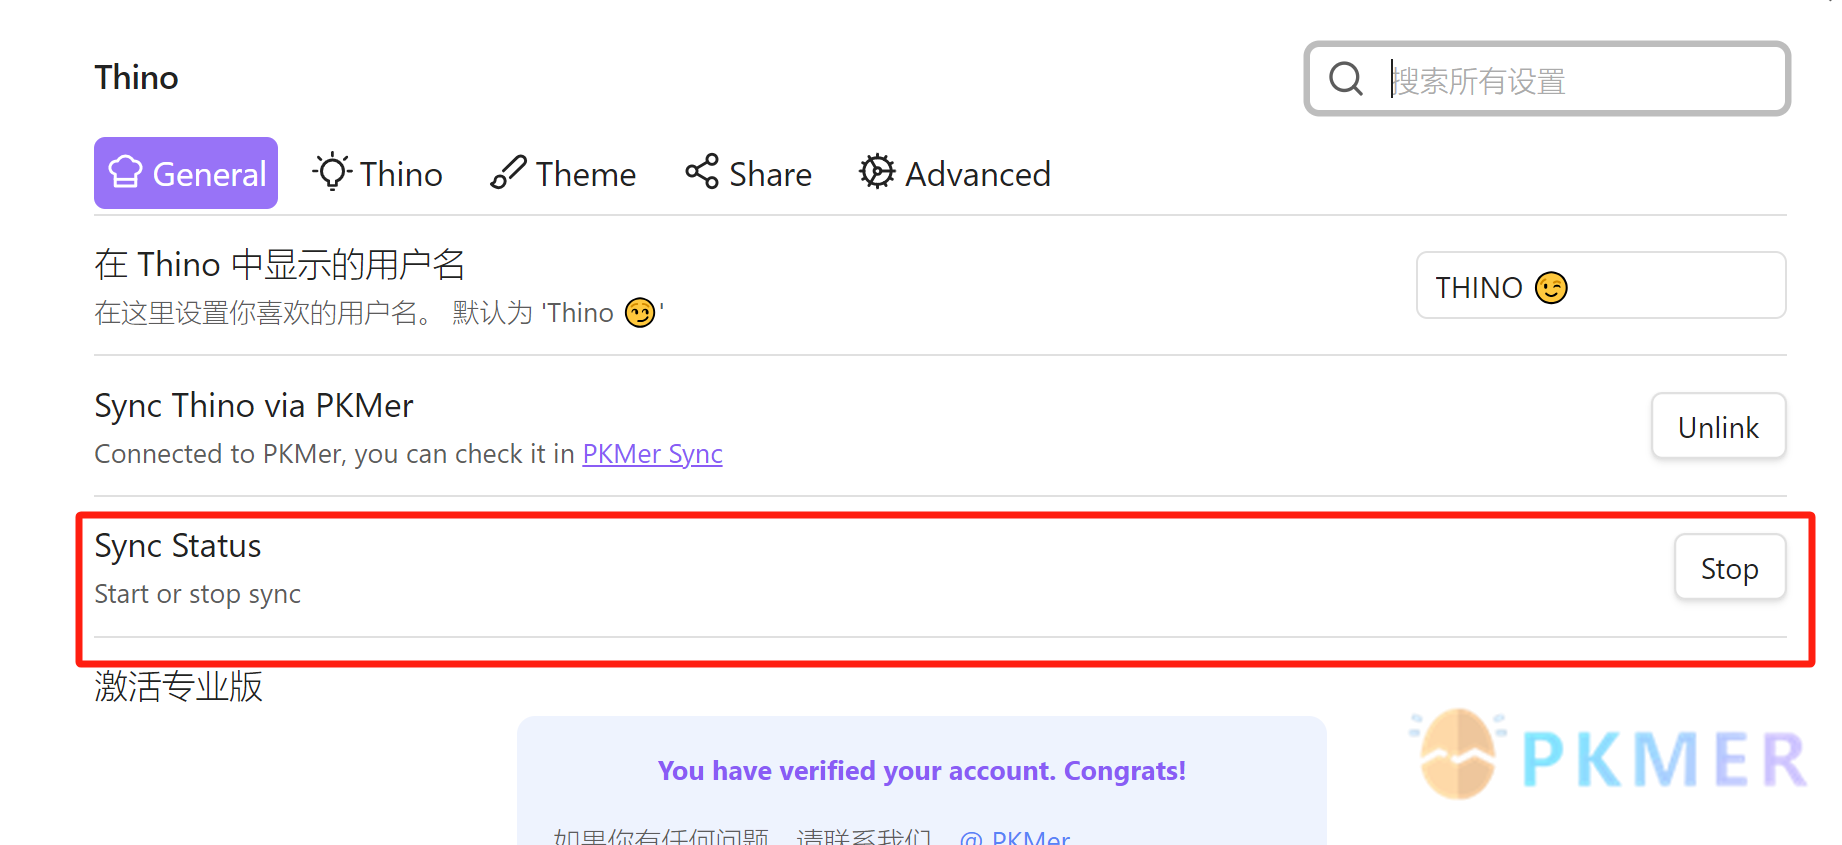
After the activation is completed, you will see the following prompt in the plugin settings:

Thino Web
Activation
- Purchase Web service or purchase PKMer member package service
- During the internal test phase of the synchronization service, for users who have purchased the local version, you can use it for free temporarily. After the pricing comes out, you will be notified in advance of the end of the free period and the subsequent purchase strategy
- Activate synchronization:
- 【Website】In the personal center, find the one-click activation button.
- 【Website】
Click to activate sync. You will find that the Sync Thino button in the plugin setting page becomesunlink, indicating that it has been linked to the Web service. - 【Plugin】Enter the plugin settings, click
Startin Sync Status manually, and you will find that the status becomesSyncing, indicating that the synchronization is successful.
Notice
- Synchronization requires both ends to use the same account and enable the synchronization function
- Only one end is enabled for synchronization, and the machine does not know where to synchronize to, so it will not be synchronized