

Thino 工作流实战:Thino 与 anki 的联动
Thino Workflow in Practice: Integration of Thino and Anki
This is the familiar interface:
This is the familiar Anki card interface:
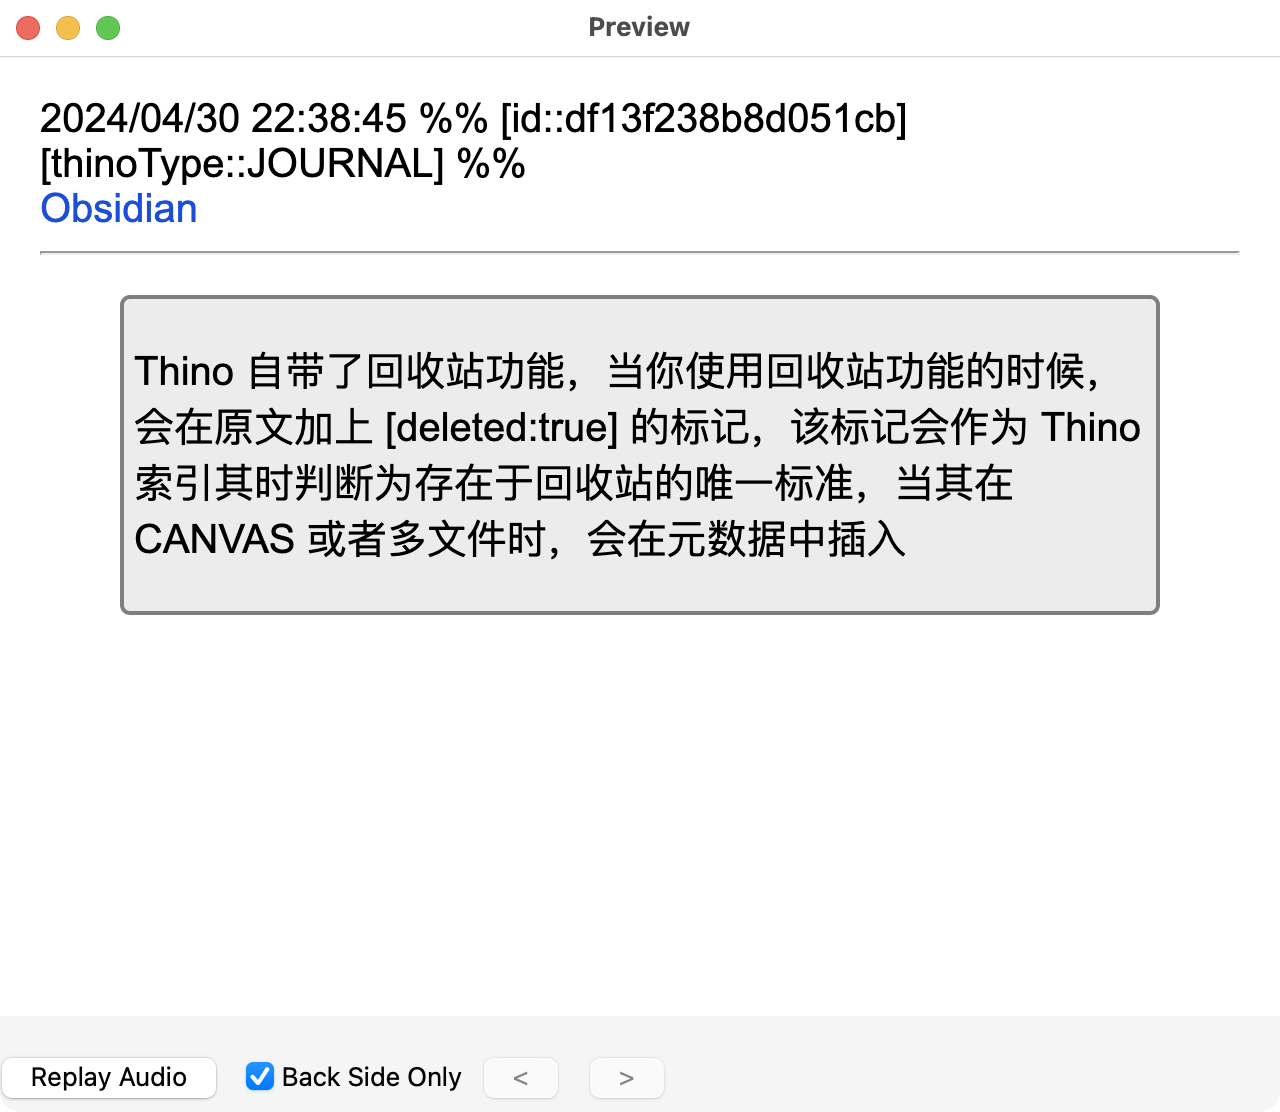
By adjusting the plugin according to this tutorial, you can review thino cards with the help of anki.
Before starting to write the specific tutorial, let me briefly talk about the style of content I record in thino, whose information organization is inspired by Teacher Xu Zipei’s book “The Second Brain” (which I read on the Dedao APP).
Essentially, a card is organized as “information block + tags”. It is recommended to read Teacher Xu’s book, which explains the benefits of this information organization in great detail, and I believe it will be very inspiring to you.
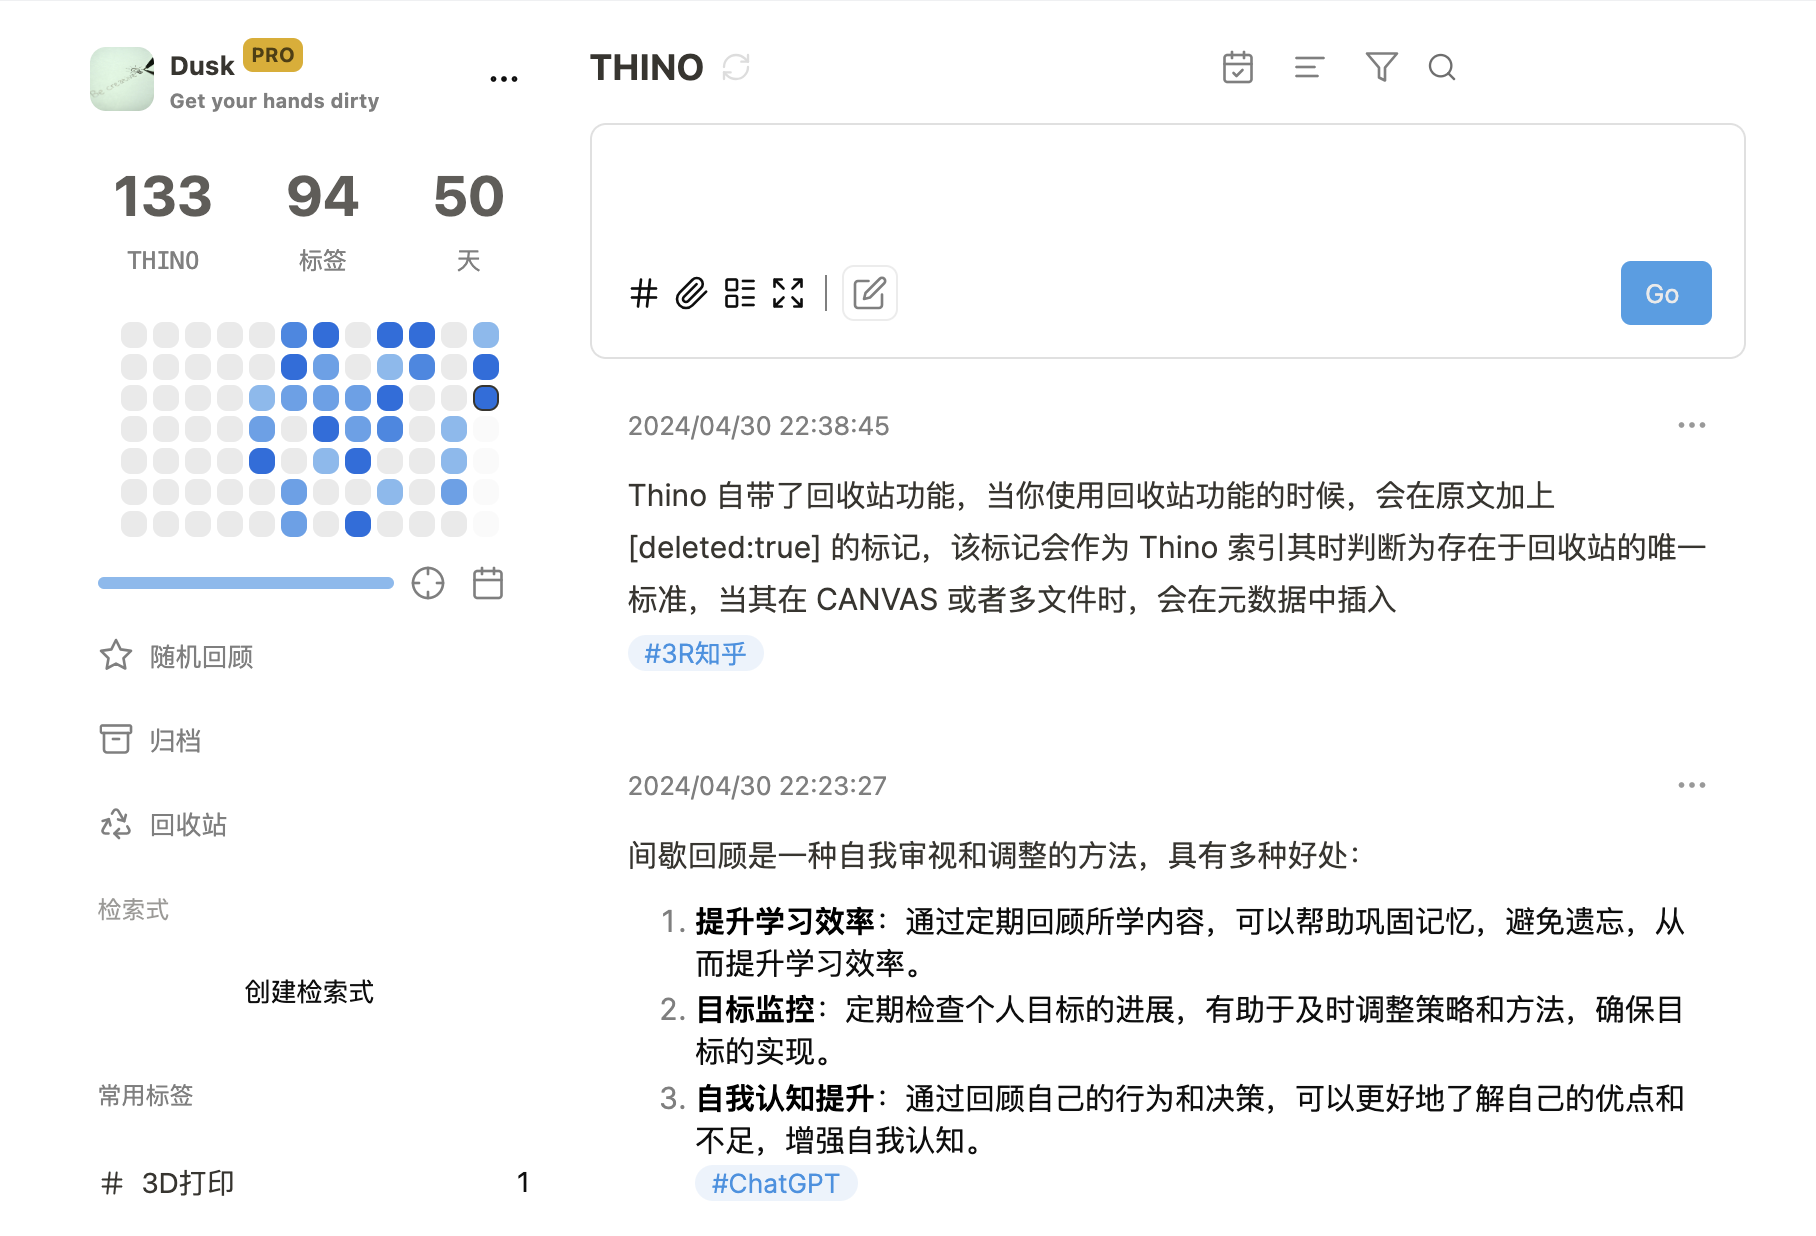
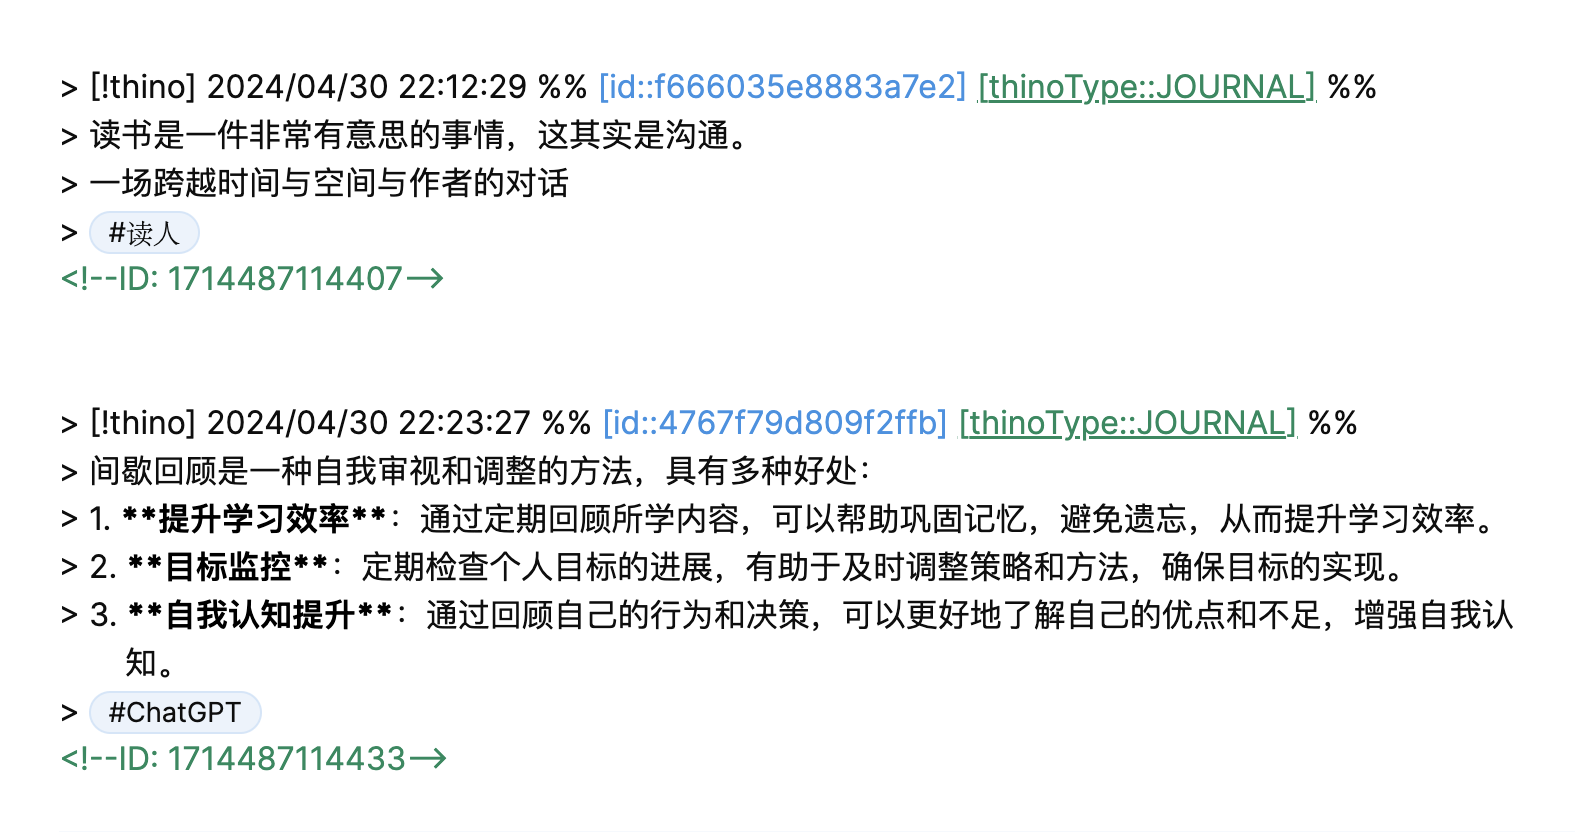
Therefore, as shown in the figure above, every card I have in
Plugin Preparation
Required plugin: obsidian to anki, the official plugin name is now: Export to Anki, hereinafter referred to as “the plugin”
Plugin configuration introduction omitted
Specific Configuration Process
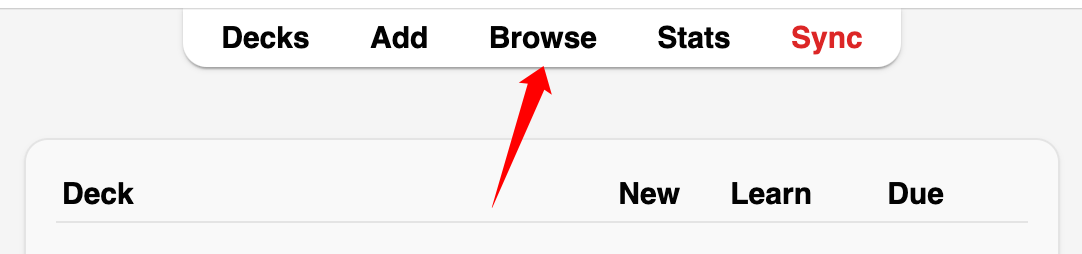
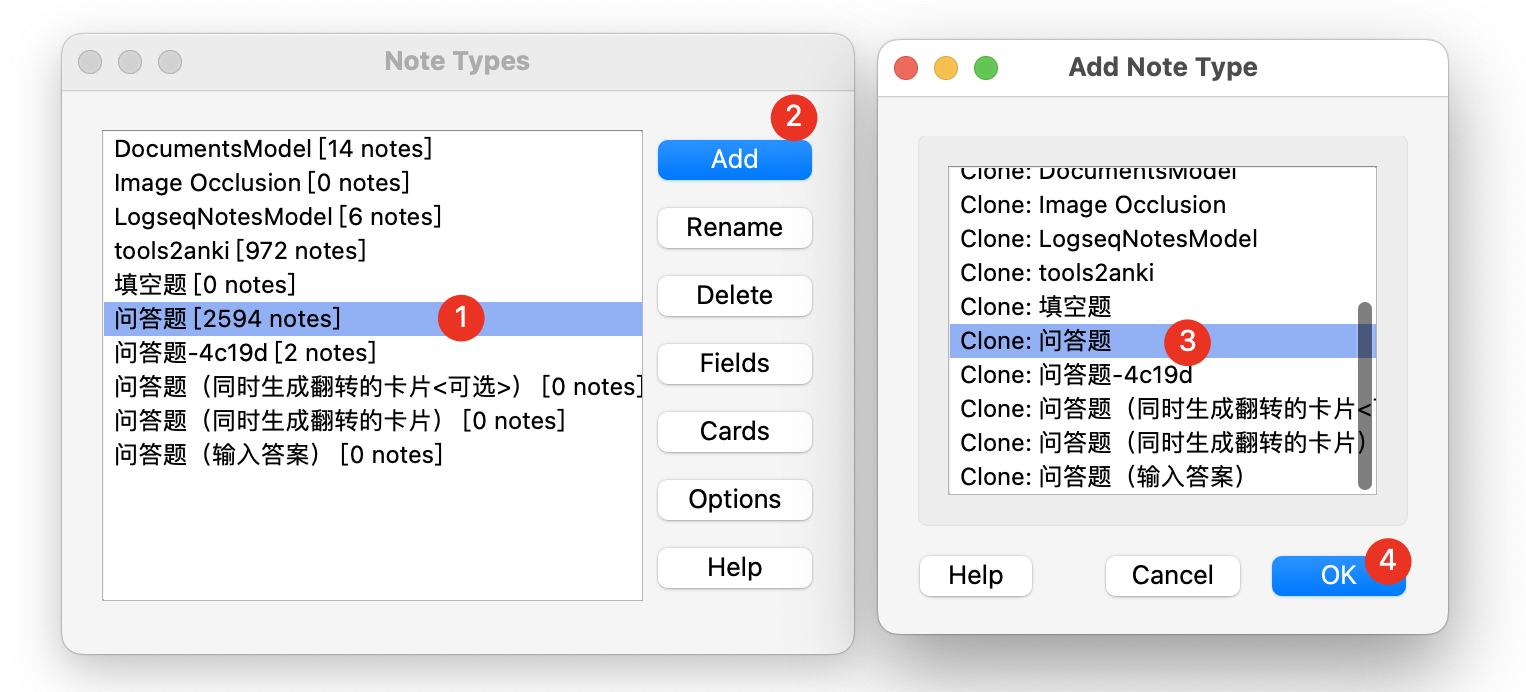
Create a Dedicated Thino Card Style in Anki
Enter Browse:
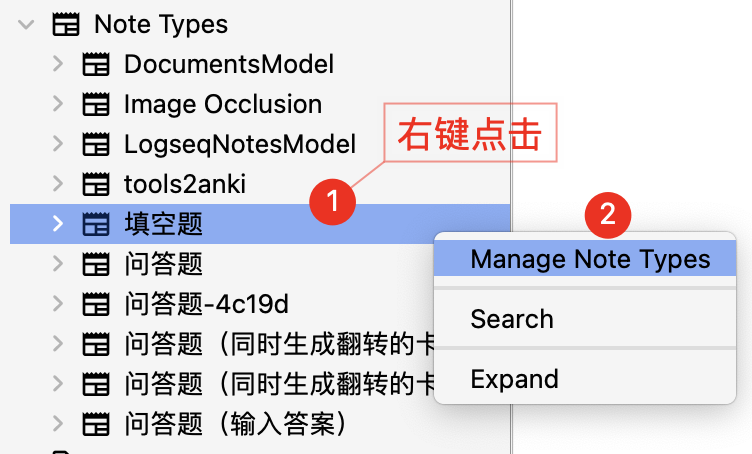
Find the note type and create a separate card style for Thino cards. The benefit is that it will be more convenient to change the style later (In this tutorial, the original card style is directly continued).
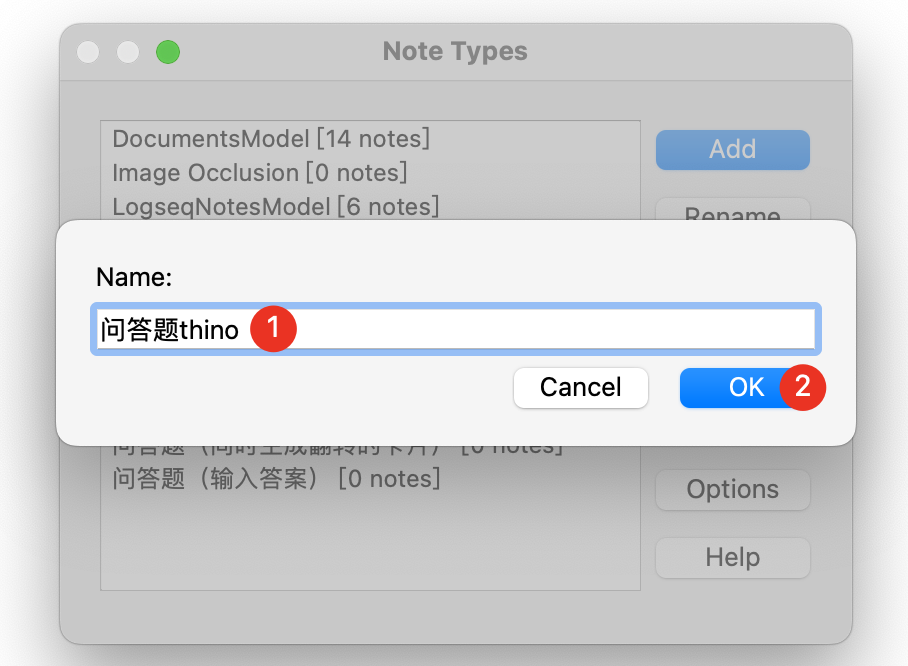
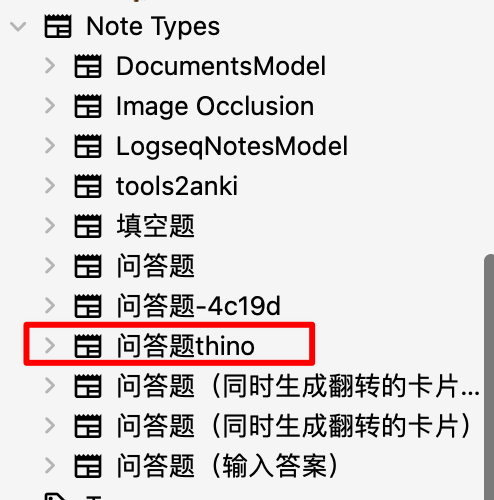
As shown in the figure below, the thino dedicated card style was successfully created
Settings Related to Obisidian to Anki
First, import the new card styles added by anki into the plugin

Once it is generated normally, it is shown below:
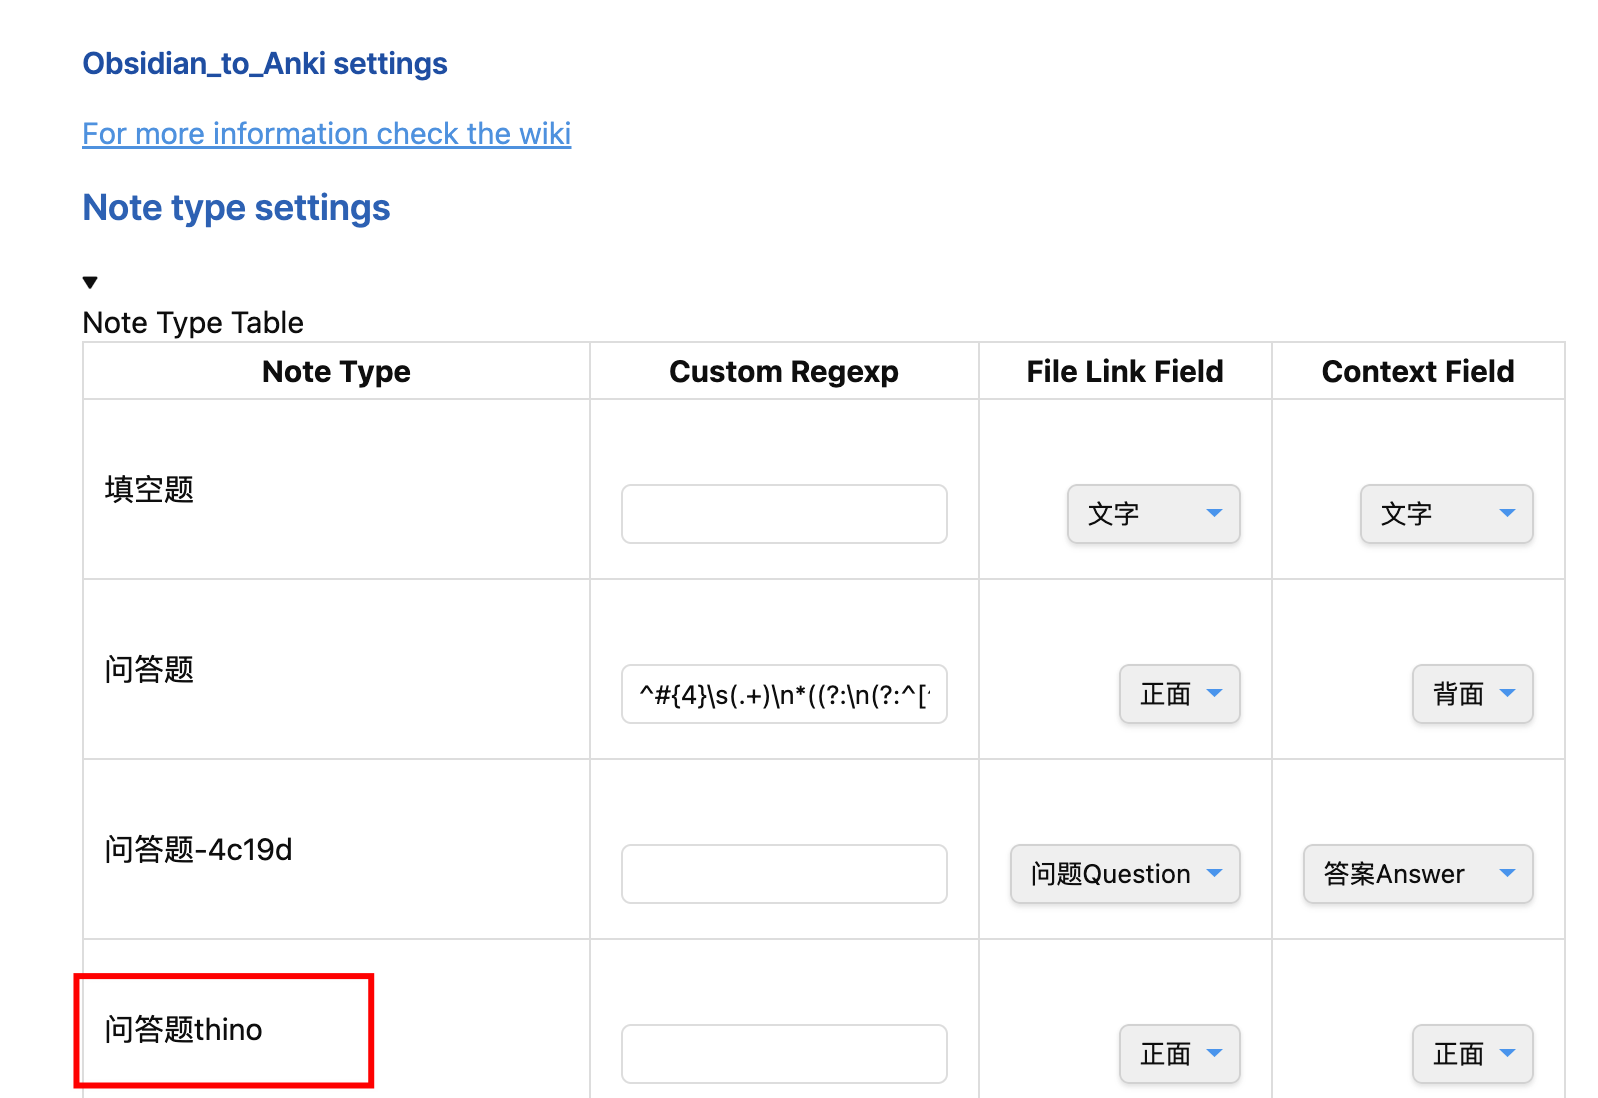
Setting up “Quiz questions thino”.

Related Syntax:
^>\s\[!thino\]\s(.+)\n*((?:\n(?:^[^\n#].{0,2}$|^[^\n#].{3}(?<!<!--).*))+)OK, so the configuration is complete.
Start Testing
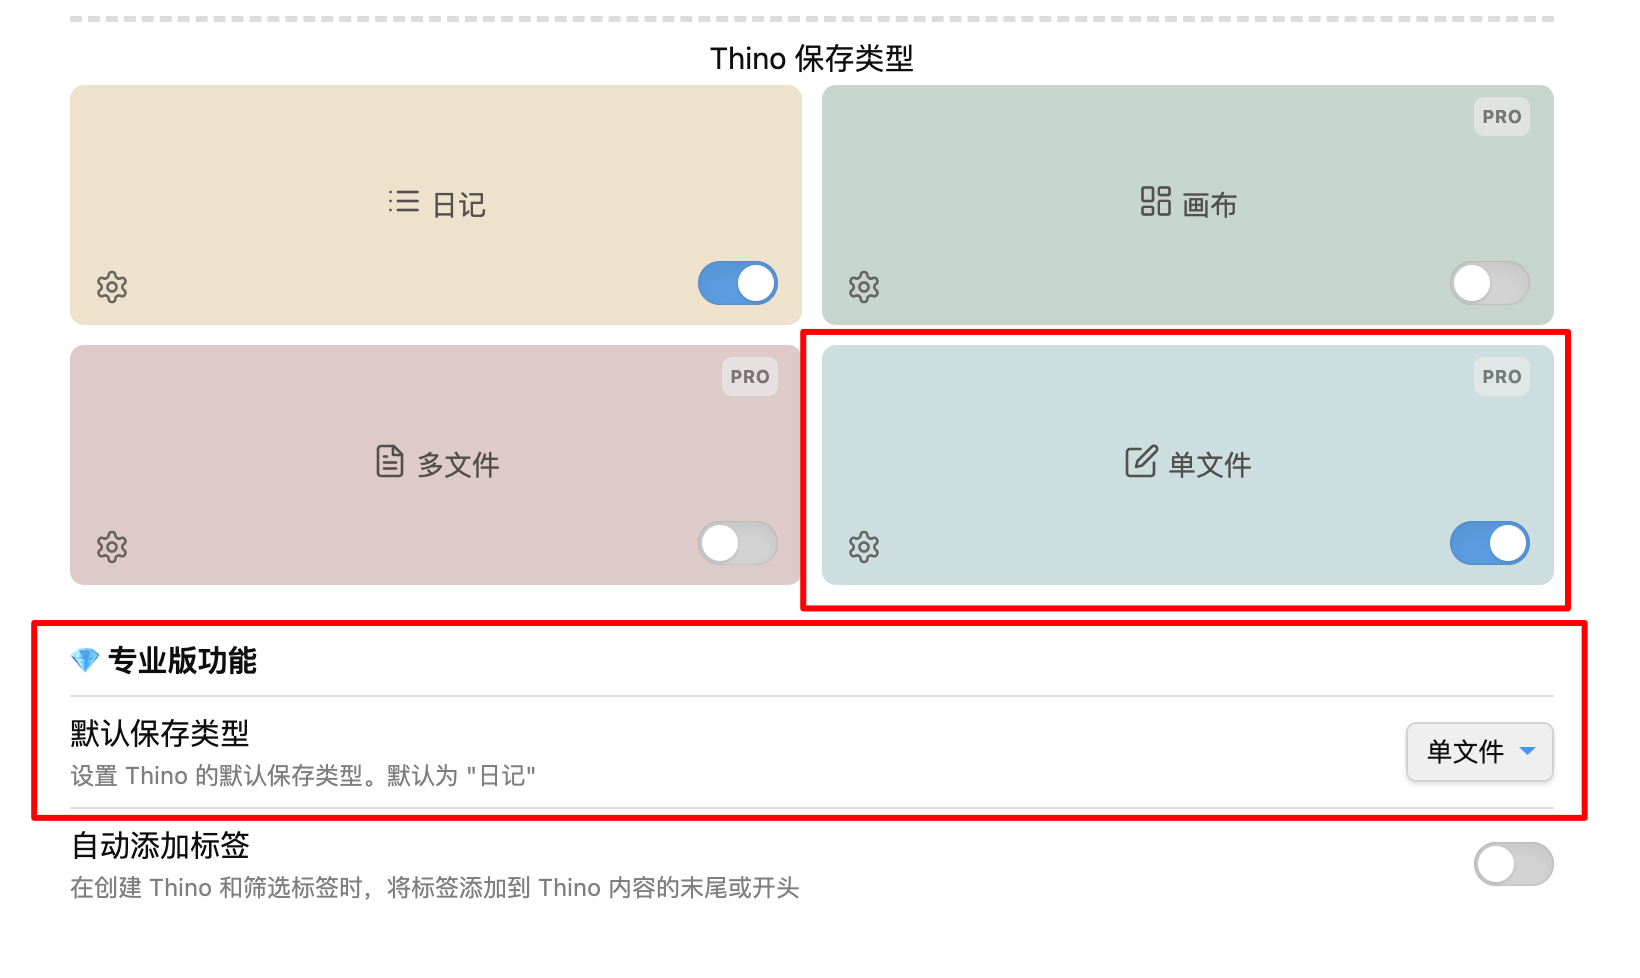
It is worth noting: I use the ‘single file’ format for saving in thino, and the configuration method in this article is also based on this format. I have not used other types.
In a normal input box, normally input the ‘information block + tag’ format
In the file “Single File”, make one adjustment, which is to specify the “Deck Name”, to make reviewing convenient.
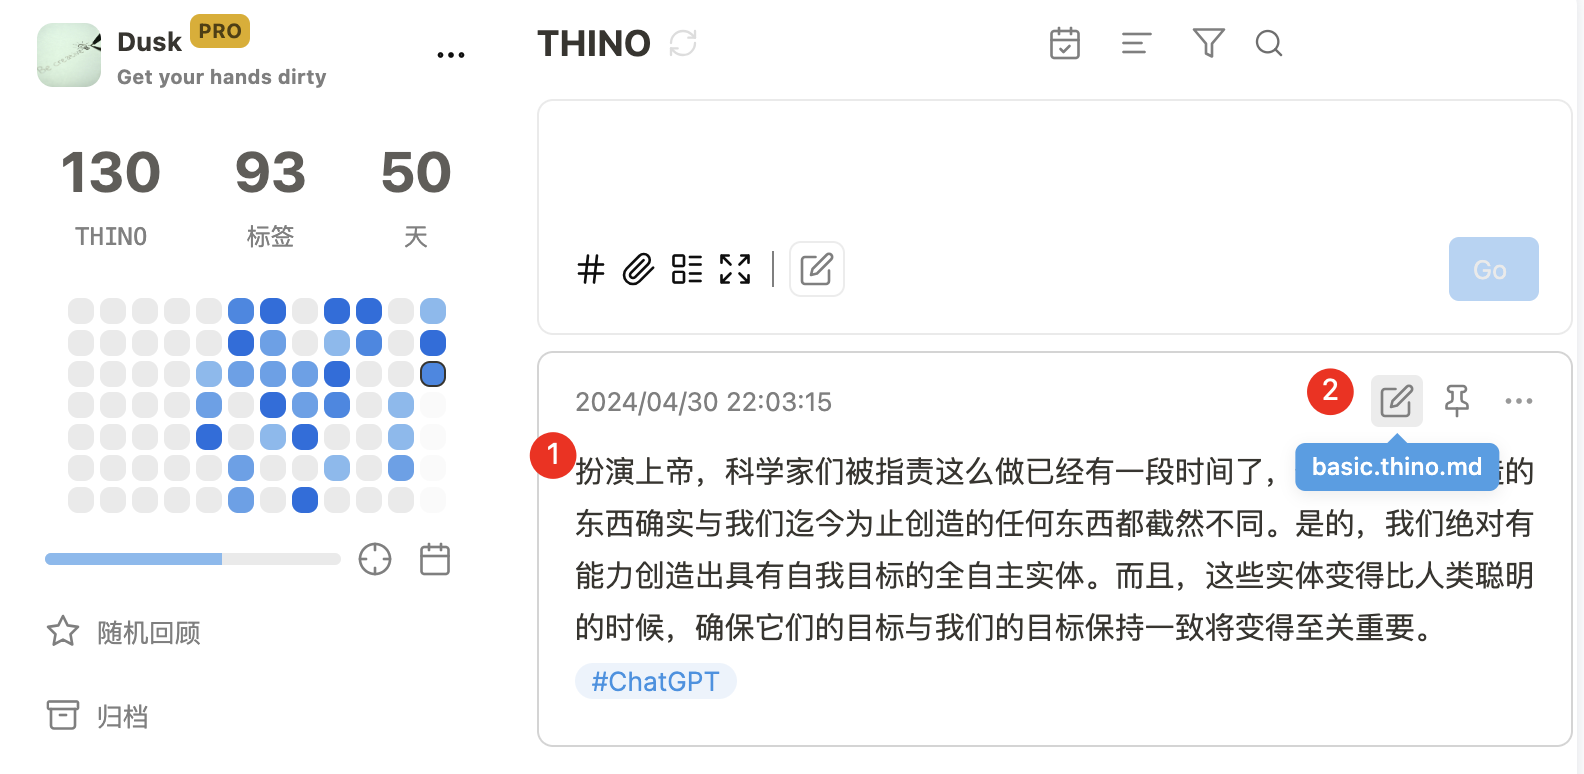
The default file name should be basic.thino.md, which can be accessed by clicking on the 2nd point in the picture above.
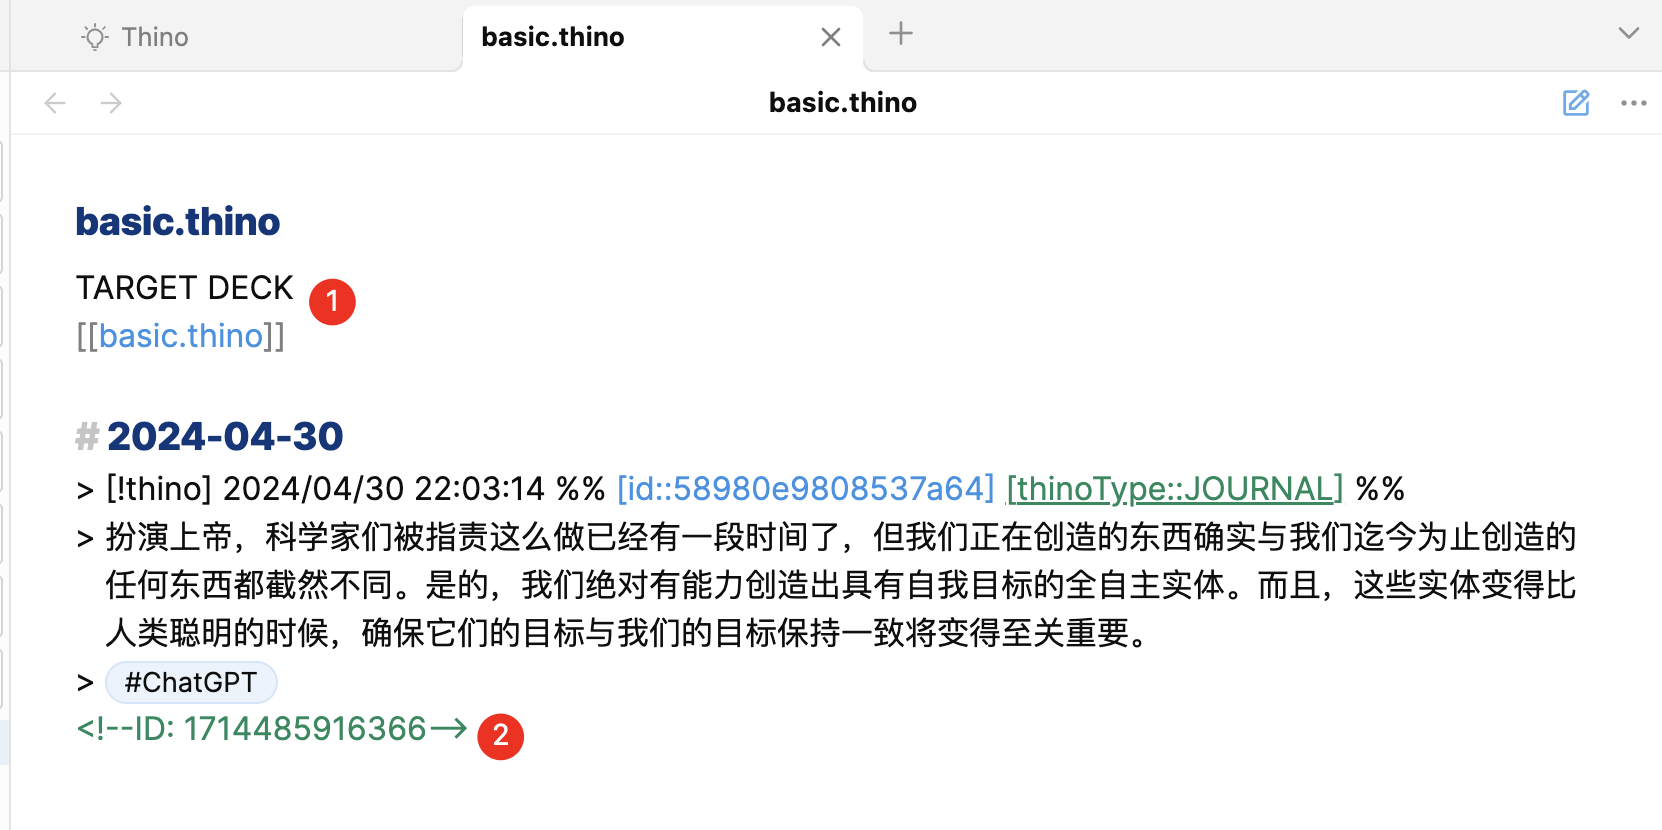
As shown in position 1 of the image above: add a ‘deck name’.
In normal use, after finishing writing notes in Thino, just run the “obsidian to anki” plugin. If the card ID appears in position 2 of the image above, it means the card has been generated normally.
The following images respectively show the card decks in the Anki software, the normal form of card generation in the original Thino file, and the normal generation of tags in the Anki software.
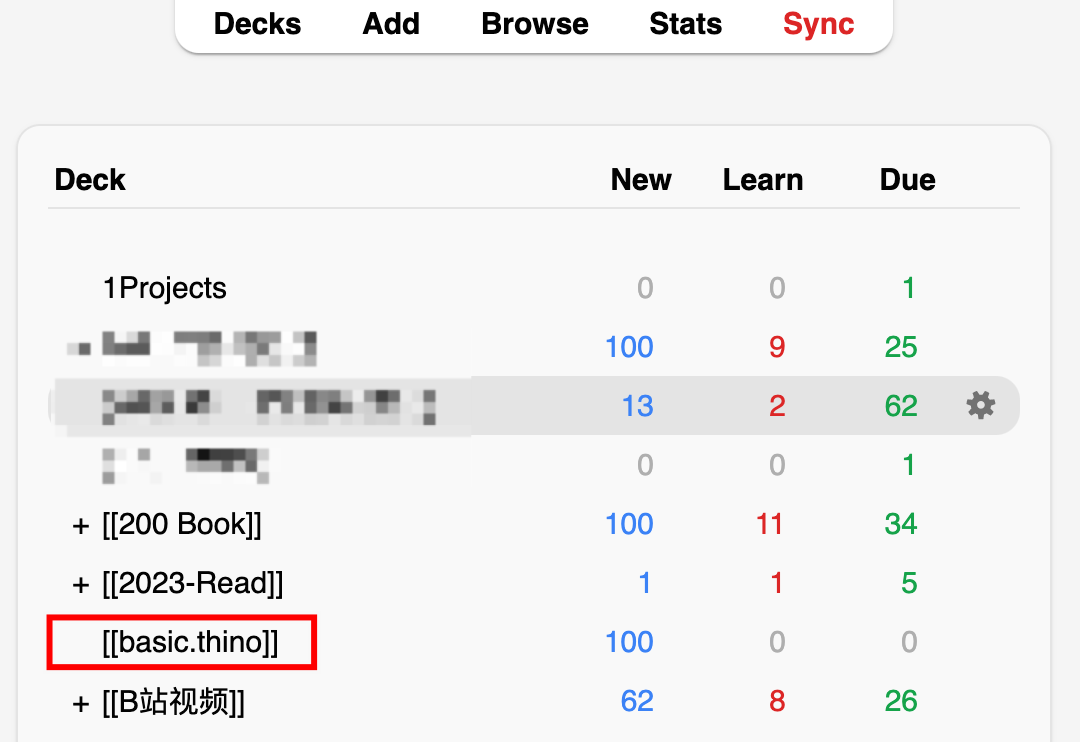
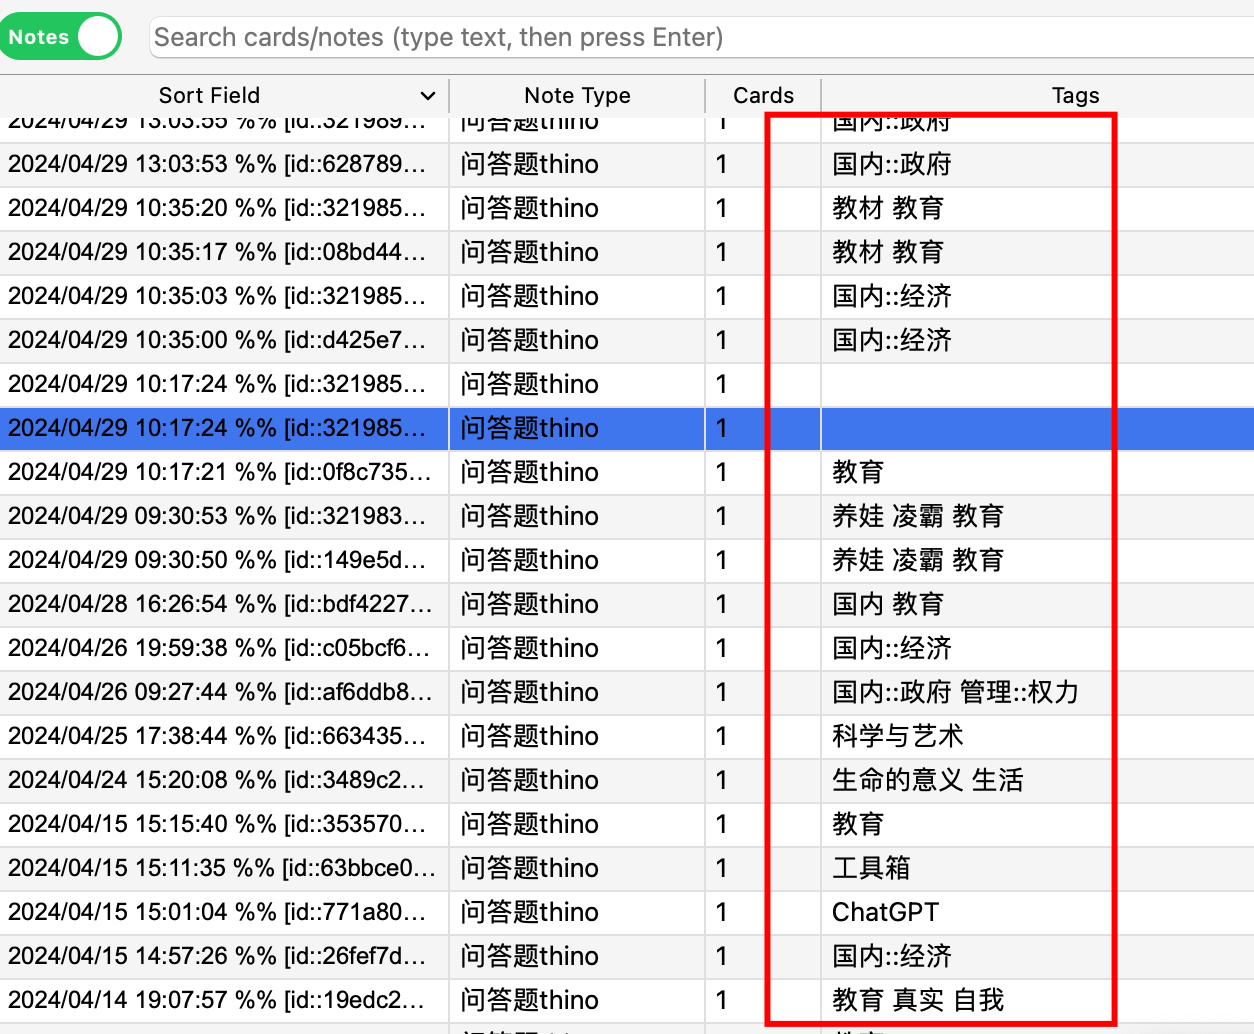
It can be seen that both cards and labels can be read normally.
For how this multi-level card is generated, see my other article in the community, which explains how to adjust the plugin.